

Black Voices, Black Joy: Crown Tutorial
M is for Melanin: A Celebration of the Black Child is an alphabet book that highlights Black positive images and affirmations to encourage children to love and embrace the skin they're in. The author Tiffany Rose uses the letter K for king and Q for queen. In this activity, I will show you how to make a paper crown. There's lots of room to be creative and put your own spin on it to turn into something fit for royalty.
Grab your own copy of M is for Melanin from the Hammer Store!
Supplies Needed:
- 3 sheets of paper
- scissors
- coloring pencils and/or markers
- ribbon or strip of fabric
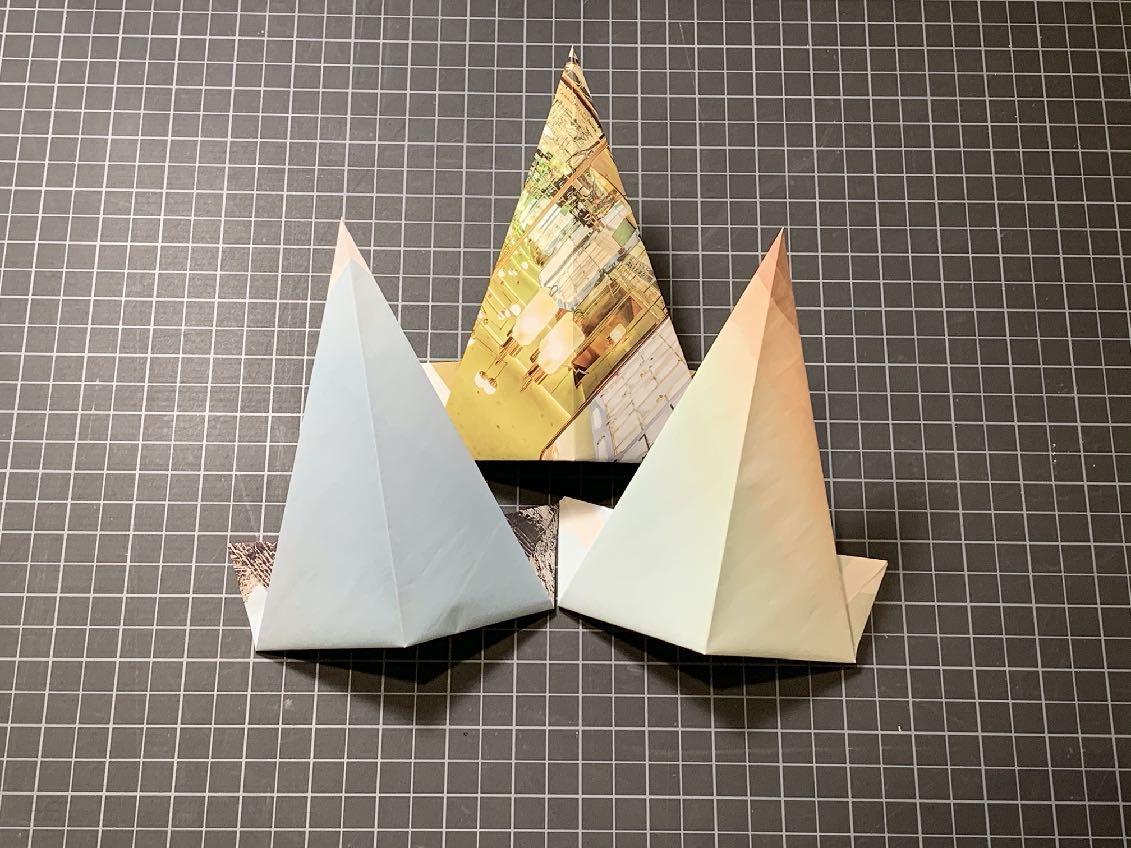
1. Gather a few sheets of paper. I'll first demonstrate how to fold a crown using plain paper, but feel free to get creative! Pencils, markers and paint can be used to add color to your paper later on. Do you have old magazines with colorful photos, or wrapping paper? You can use those too!
2. Fold the paper diagonally to bring a side edge to meet up with the bottom edge.
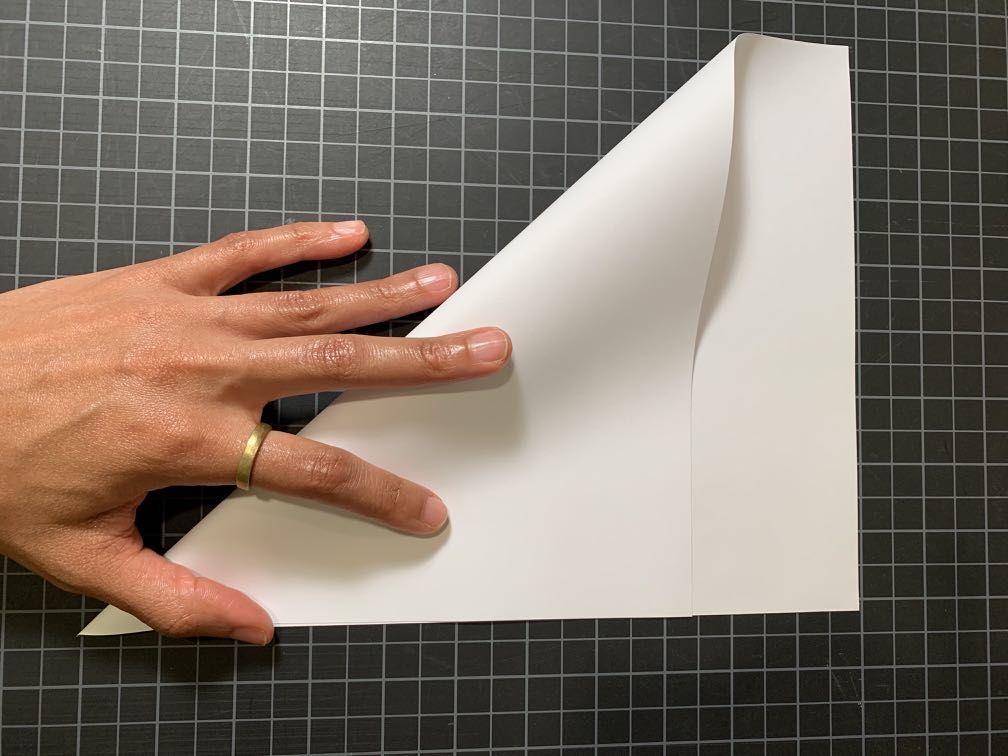
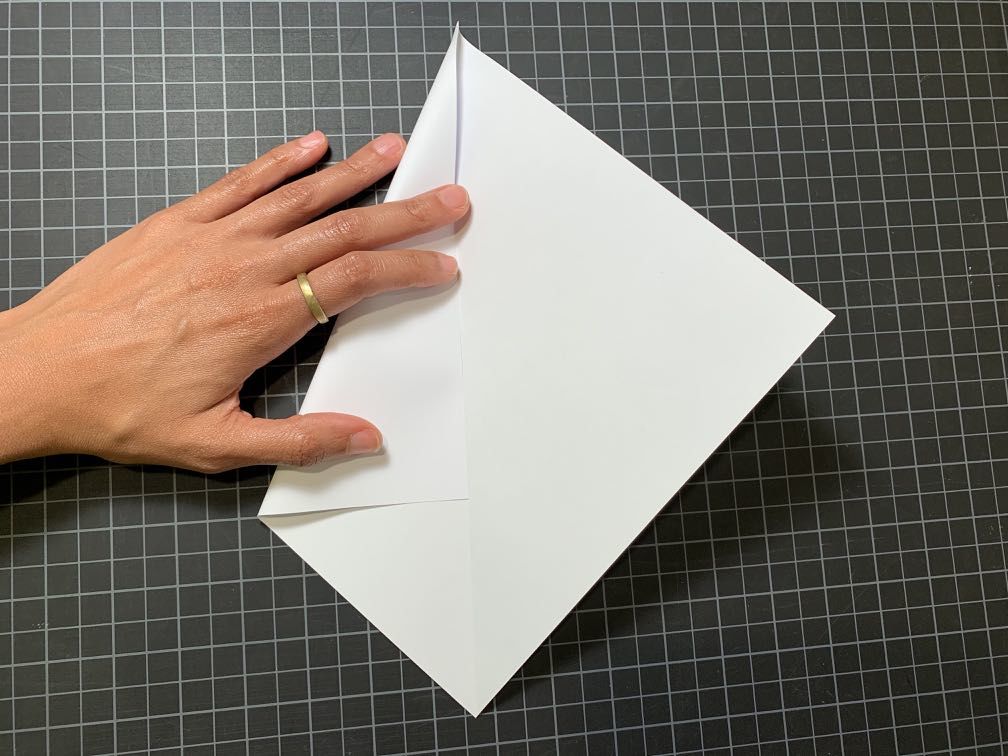
3. Press and hold firmly. Trim the excess paper so that you are left with just the folded triangle.

4. Open your triangle to see that you now have a square piece of paper. Take one corner of the square and bring it to meet the crease in the center of the paper. Press your new fold firmly.
5. Take the opposite corner and repeat, bringing it to meet the crease in the middle of the paper. Press new fold firmly
6. Take the bottom corner and bring it up so the point aligns with the edges of the two triangles you just folded.
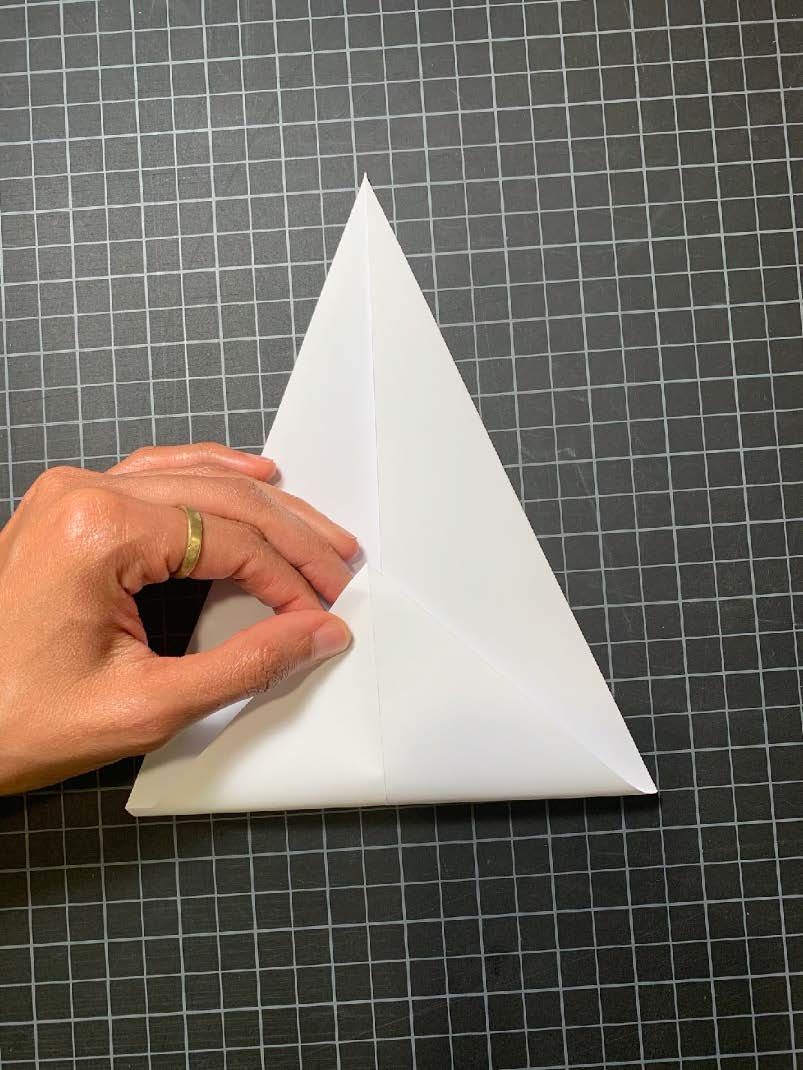
7. Press your new crease firmly, then bring the point of the triangle you just made down to meet the bottom of the triangle.
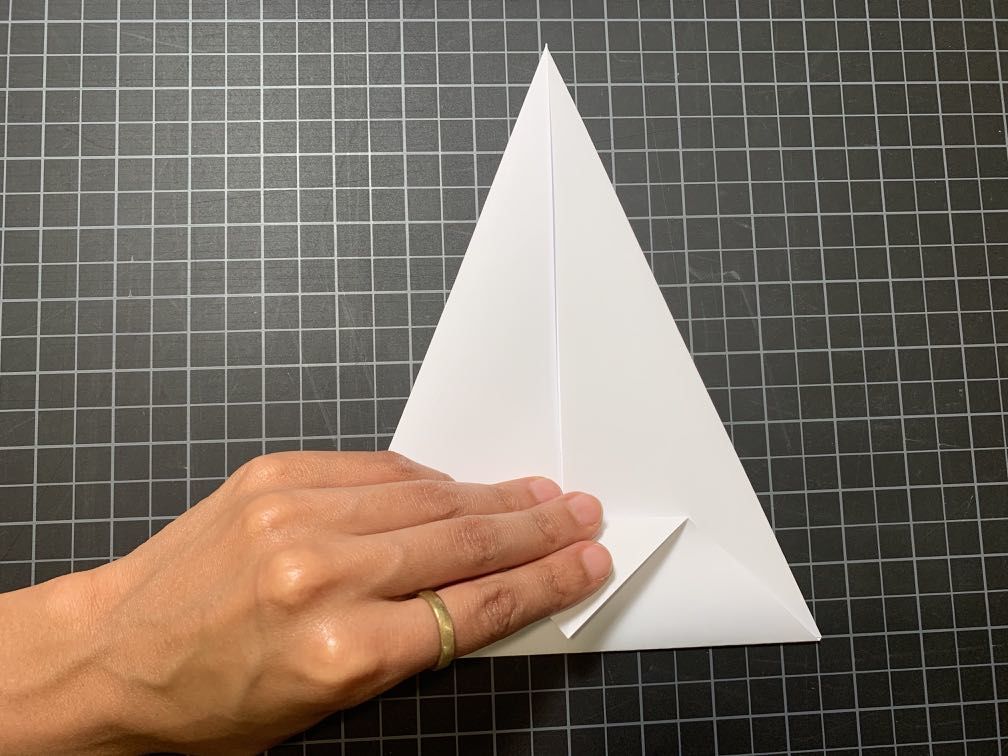
8. Bring the bottom edge of the big triangle up to make a crease along the fold of the little triangle you just made.
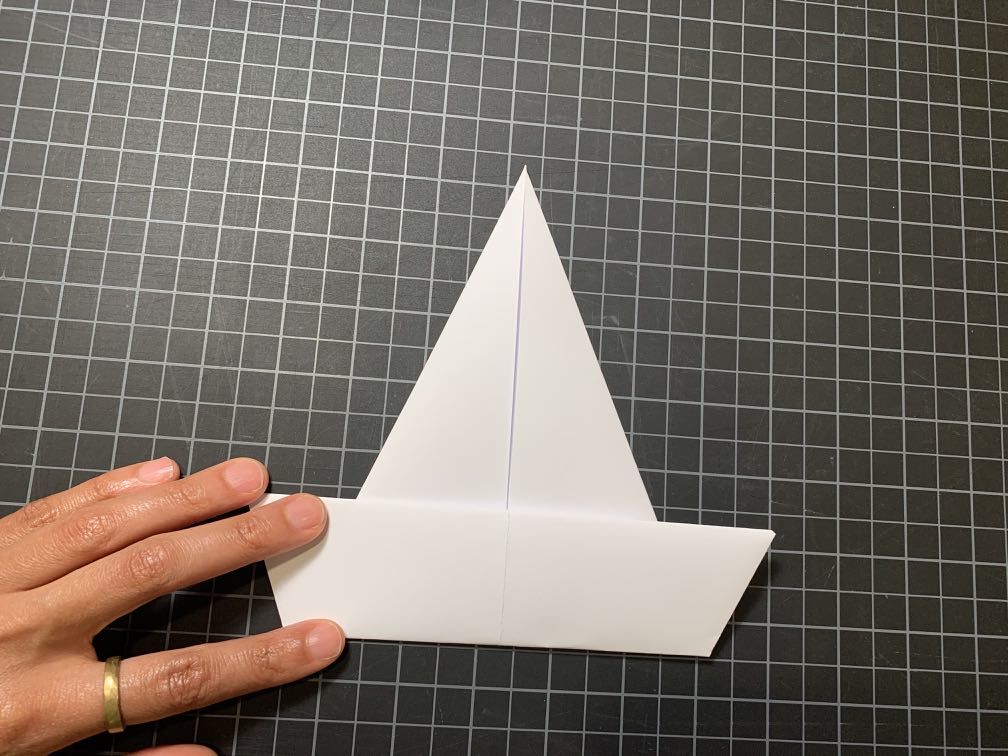
9. Flip it around and now you have the first prong of your 3-prong crown. Repeat steps 1 through 8 twice more.
10. When you have your 3 triangular prongs, feel free to decorate them with color pens, inks and/or paints.
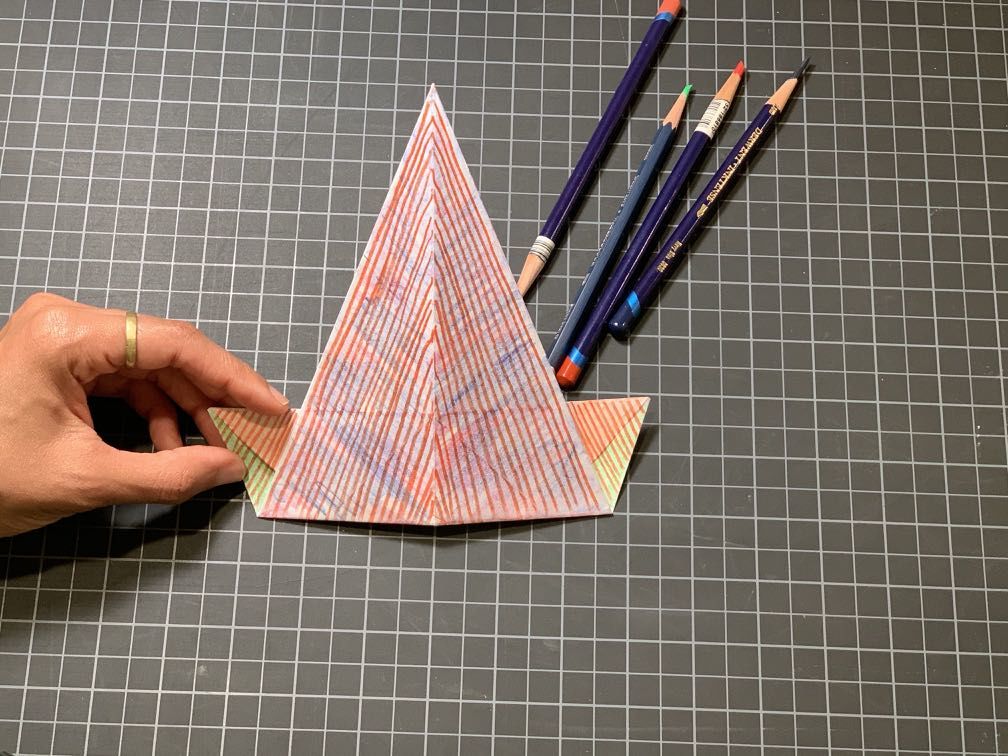
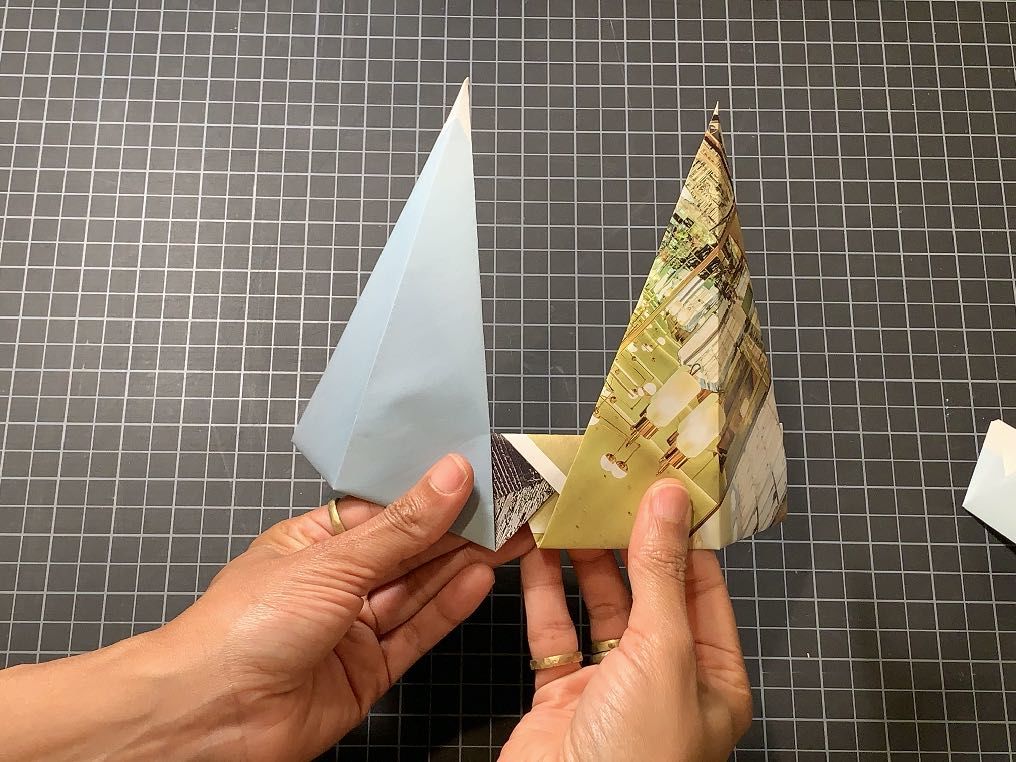
Here is another example using 3 magazine pages and following steps 1 through 8.
11. To join the three prongs, grab the one that you want in the middle. Slip the tab of another one into the the slot of the middle prong. Repeat this for the other side.
12. Turn the assembled crown around to the back. Slip your ribbon down inside the fold.
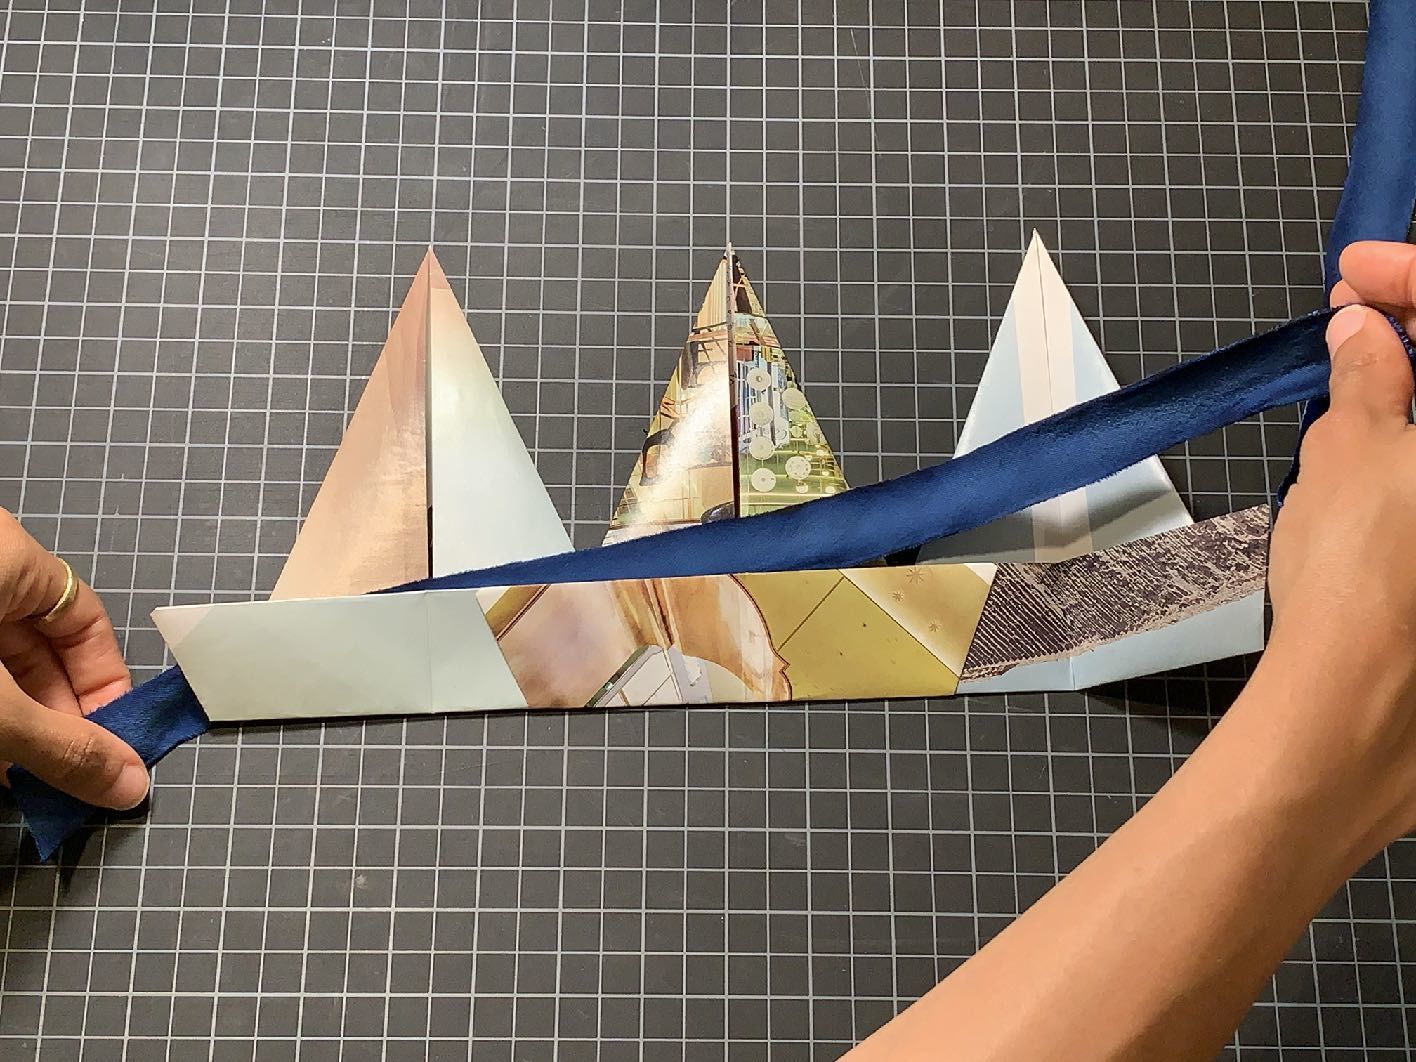
Feel free to add other decorations. Cut little shapes, glue rhinestones, pin on a brooch, add beads to the ribbon. Have fun and make it your own.
Tag us @hammer_museum to show us what you've made!

Tag us @hammer_museum to show us what you've made!
This project is a part of the Black Voices, Black Joy reading series co-presented with the Felipe de Neve branch of the Los Angeles Public Library. Visit the program webpage for more book titles and projects that will engage the whole family!

