

Hammer at Home: Wearable Art
Some art you hang up on the wall, some art you put on a pedestal, and some art you can put on your body! Artists Martha Araújo and Marisa Merz created wearable art that were featured in Hammer exhibitions. There are many ways to make art that you can wear. In the steps below teaching artist Martha Carrillo will show you how to make wearable art using a paper bag.
Recommended age: 6+
Estimated time: 45 minutes
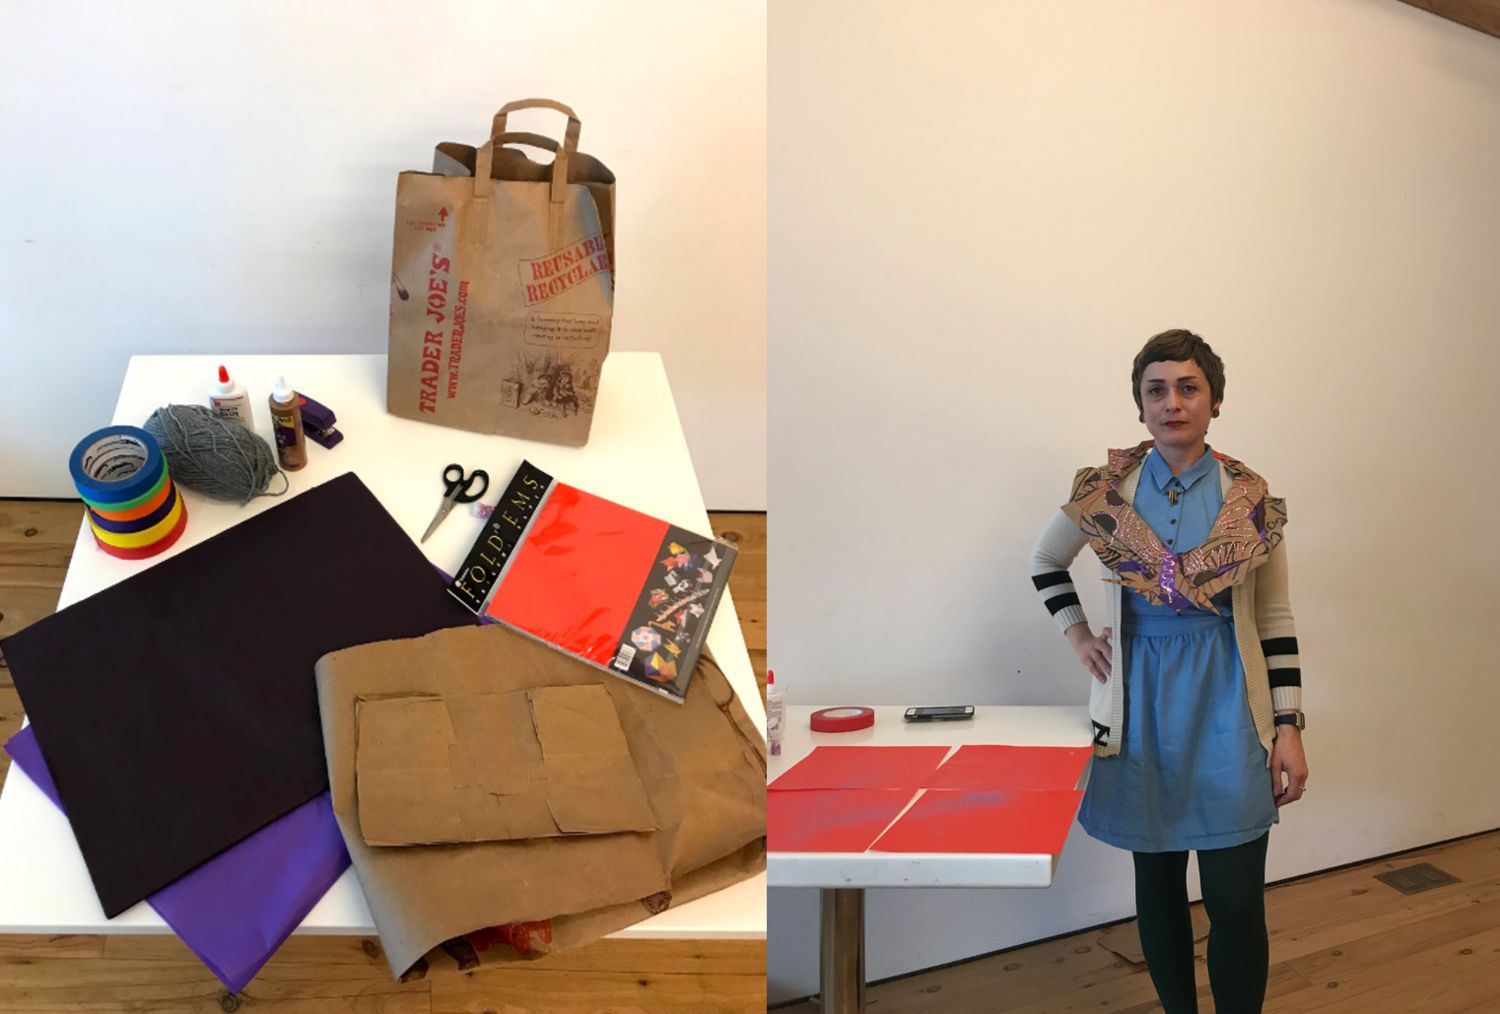
Materials:
- One brown paper bag
- Tape Scissors
- Markers or crayons
- Colored paper (tissue paper, newspaper, magazines, or other paper you have at home)
- Stapler
- Optional: Liquid glue, glitter, stamps, stickers
Instructions
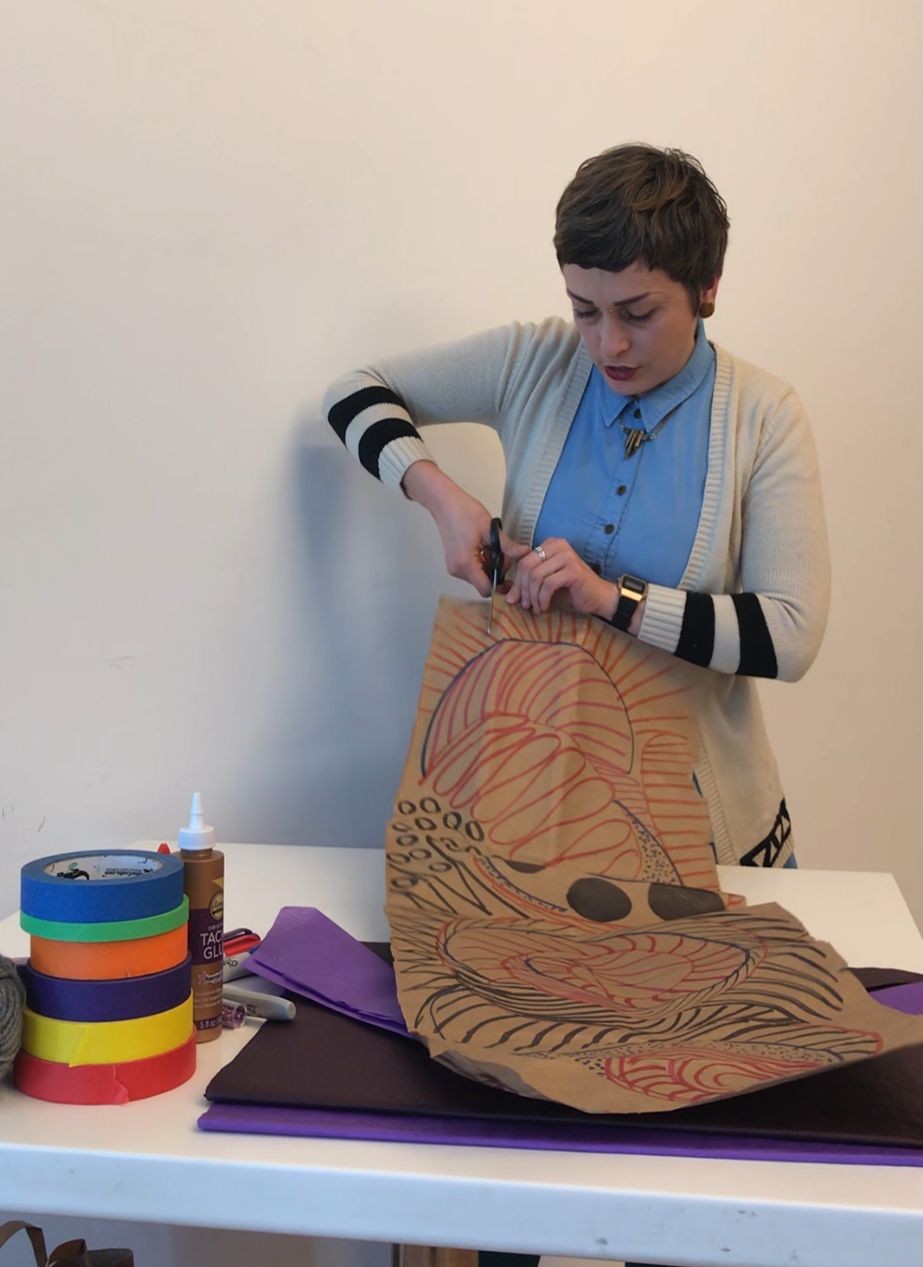
1. Use your scissors to cut along one edge of your paper bag. Cut the bottom out so you have one long piece of paper. Lay your paper flat.
2. Draw designs on the blank side of your bag using marker or crayon. If you’re stuck on a design, try making really big shapes and symbols using your favorite colors. Be sure to take up the whole page.
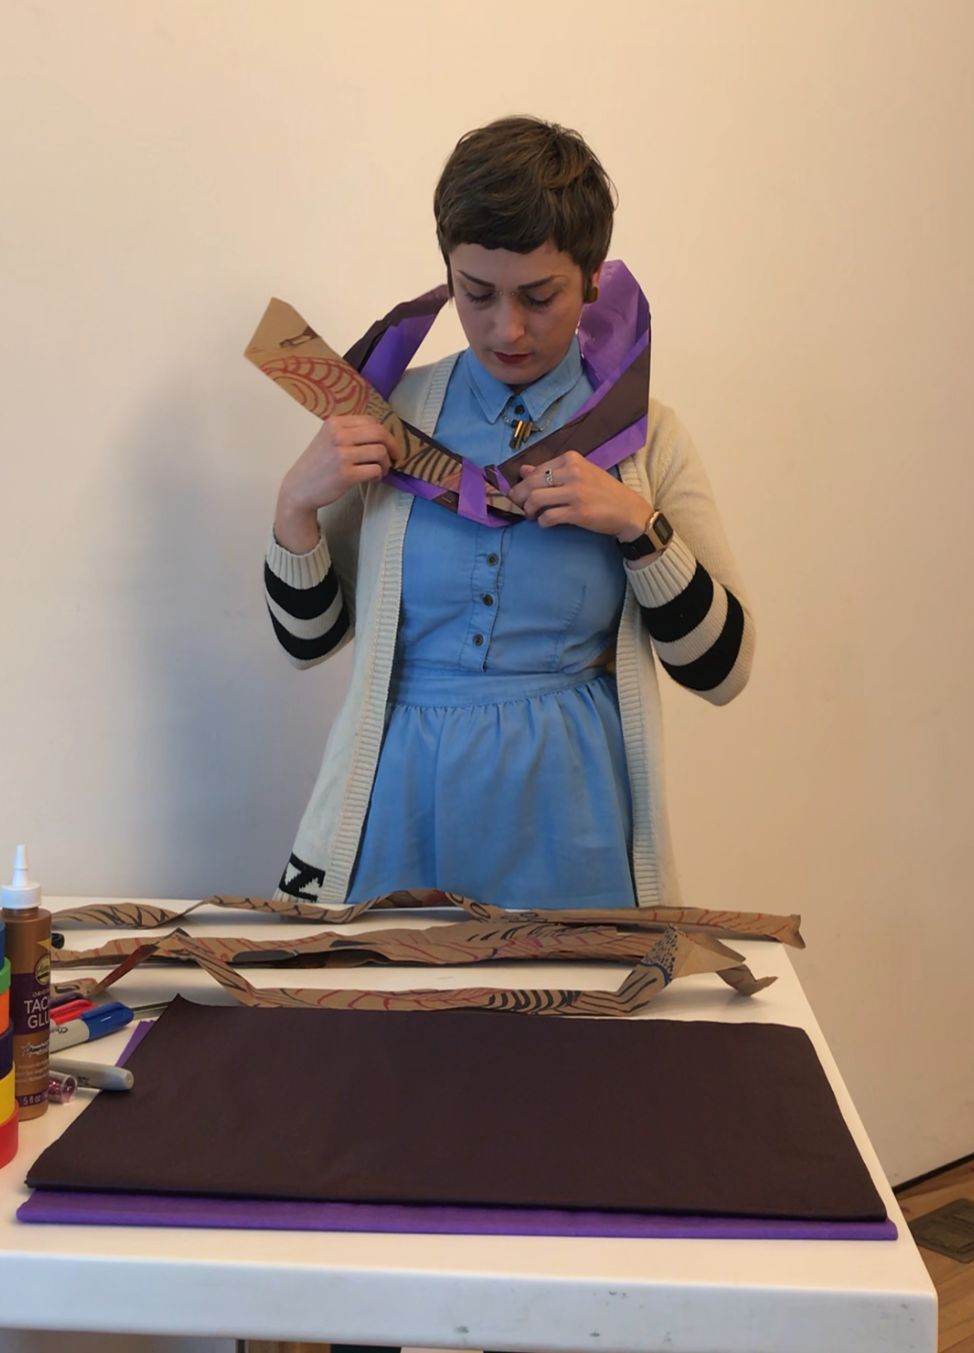
3. Fold and cut your paper into long, thin triangles, which is a great shape for creating interesting designs. You can weave, overlap, or create accordion folds using each triangle.
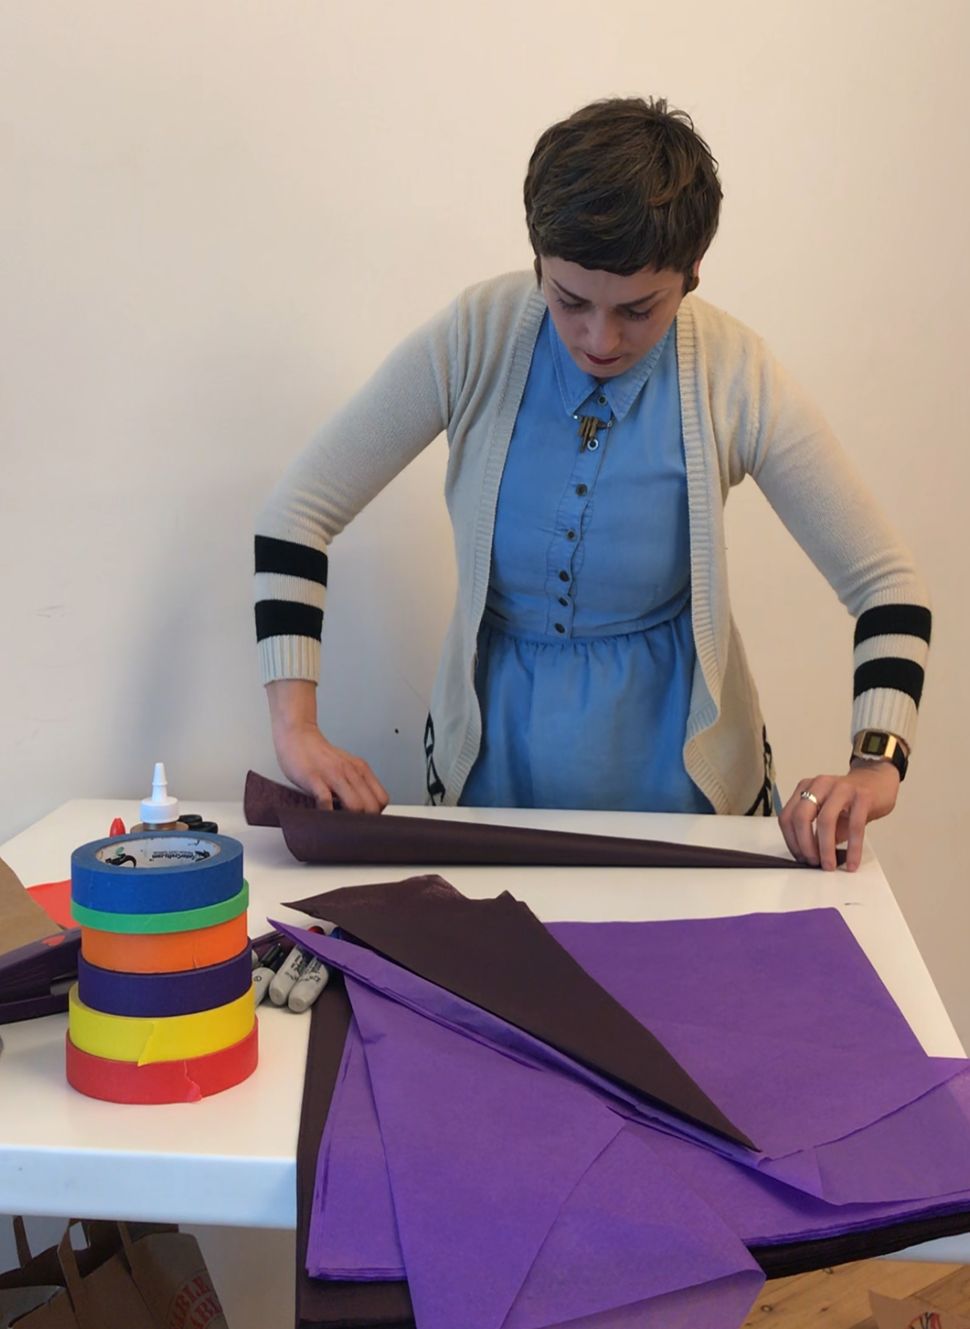
4. Hold your paper triangles up against your body and use them to form something that can wrap around your body. (Hint: it helps to be in front of a mirror!) They can intertwine in any pattern that you like. When you have your design, use a stapler to staple everything in place.
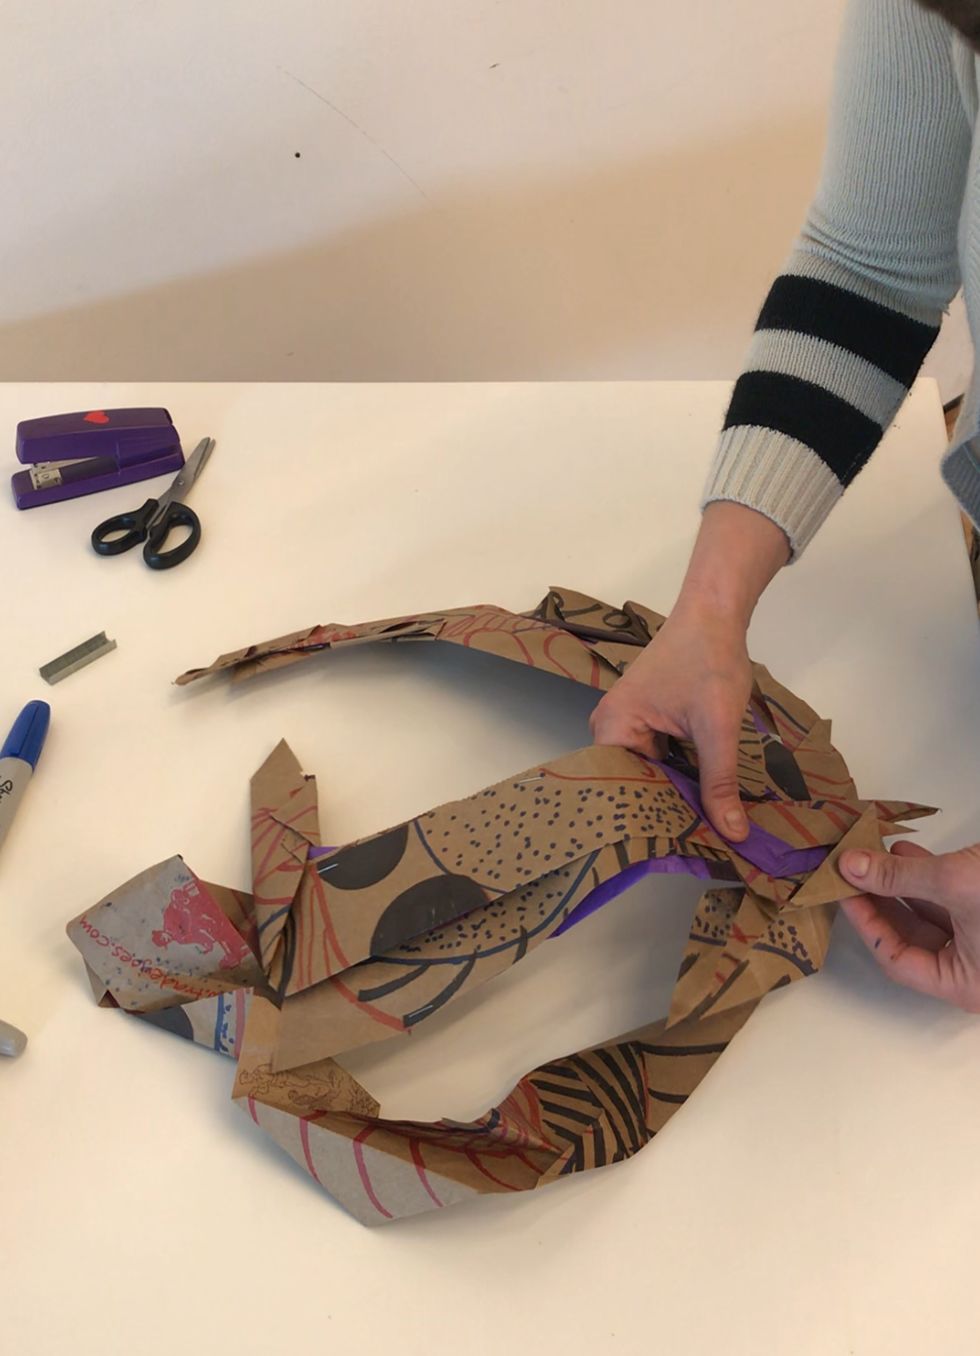
5. Grab your paper bag design. Cut the paper in half horizontally down the middle. Cut one half of the paper into horizontal strips about 2 inches long. With the other half cut out triangles like you did in step 3.
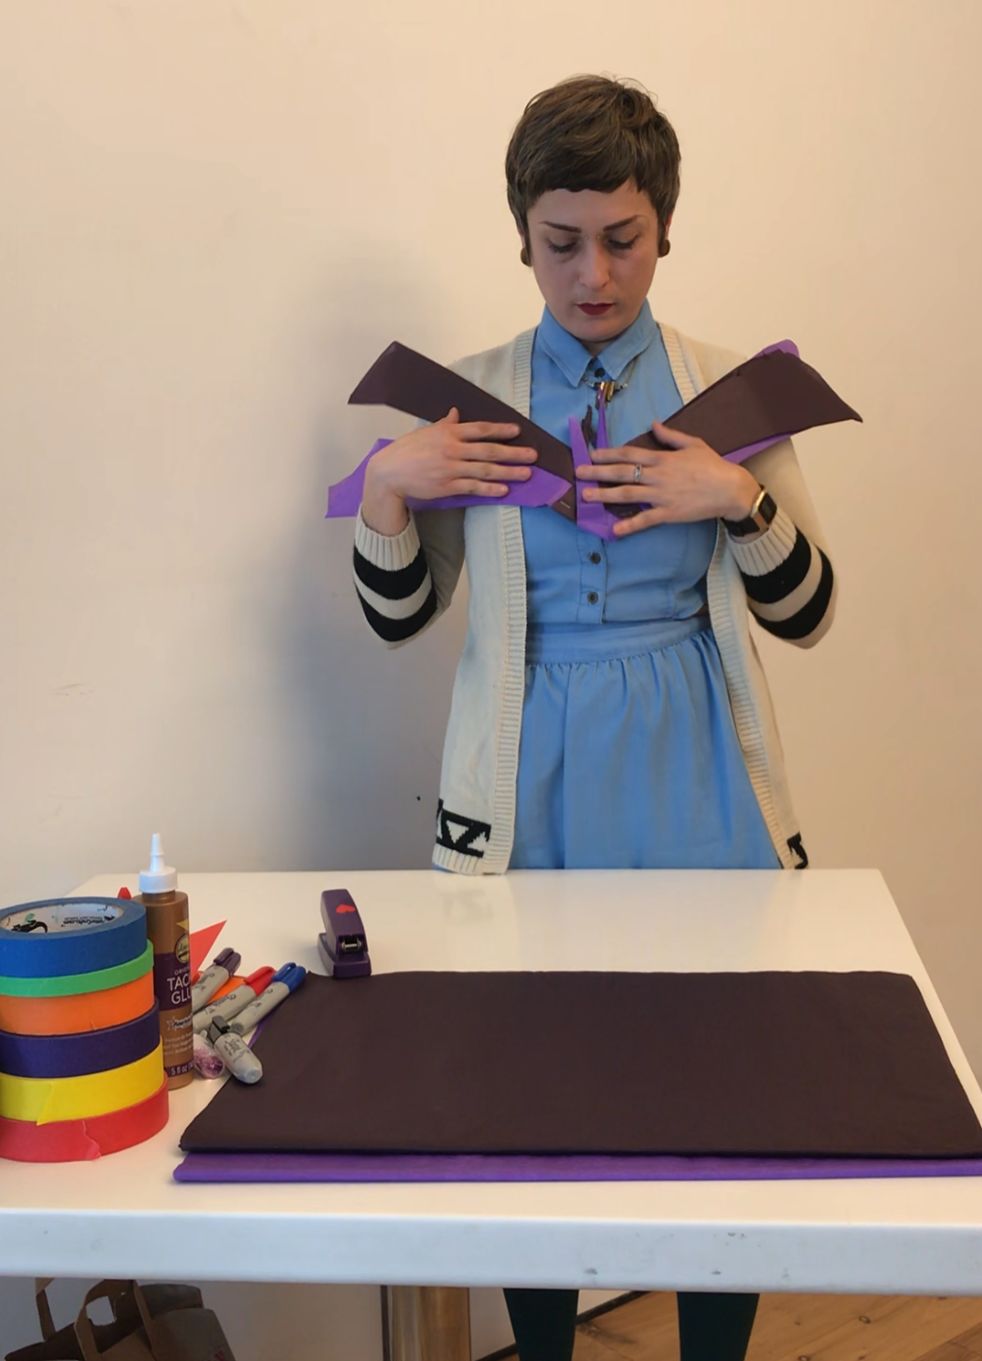
6. Intertwine your paper bag triangles with your existing design. Use your stapler to attach the pieces together.
7. Fold, braid, or criss-cross more pieces of paper onto your design. When you’ve added things you like, don’t forget to staple them into place!
8. Add extra flair to your new piece of wearable art. You can use liquid glue and glitter to add sparkle, stickers to incorporate shapes and characters, or stamps to add other fun images to your design.
9. Show us what you made! Tag us @hammer_museum to share your work! Check out this video to see some other examples of wearable art.

