
Make and Take a Seat: A DIY Tutorial
This Mother’s Day, Hammer families came together to be designers for an afternoon. Close Encounters: Make and Take a Seat was inspired by our Thomas Heatherwick exhibition, which included his studio’s innovative chair designs (think Spun Chair). Families designed and made their very own seats with the help of artist Tanya Aguiñiga.
Almost all of the supplies we used came from recycled materials, courtesy of Trash 4 Teaching (parents can get supplies from there, too; you just need to book your visit ahead of time).
Here’s a sampling of what we collected:
tape spools
fabric
shredded paper
string
corrugated plastic
cardboard tubes
colorful plexiglass squares
foam
Step 1: Decide what kind of chair you want to make. Do you want to eat in it, take a break in it, or share it with friends?
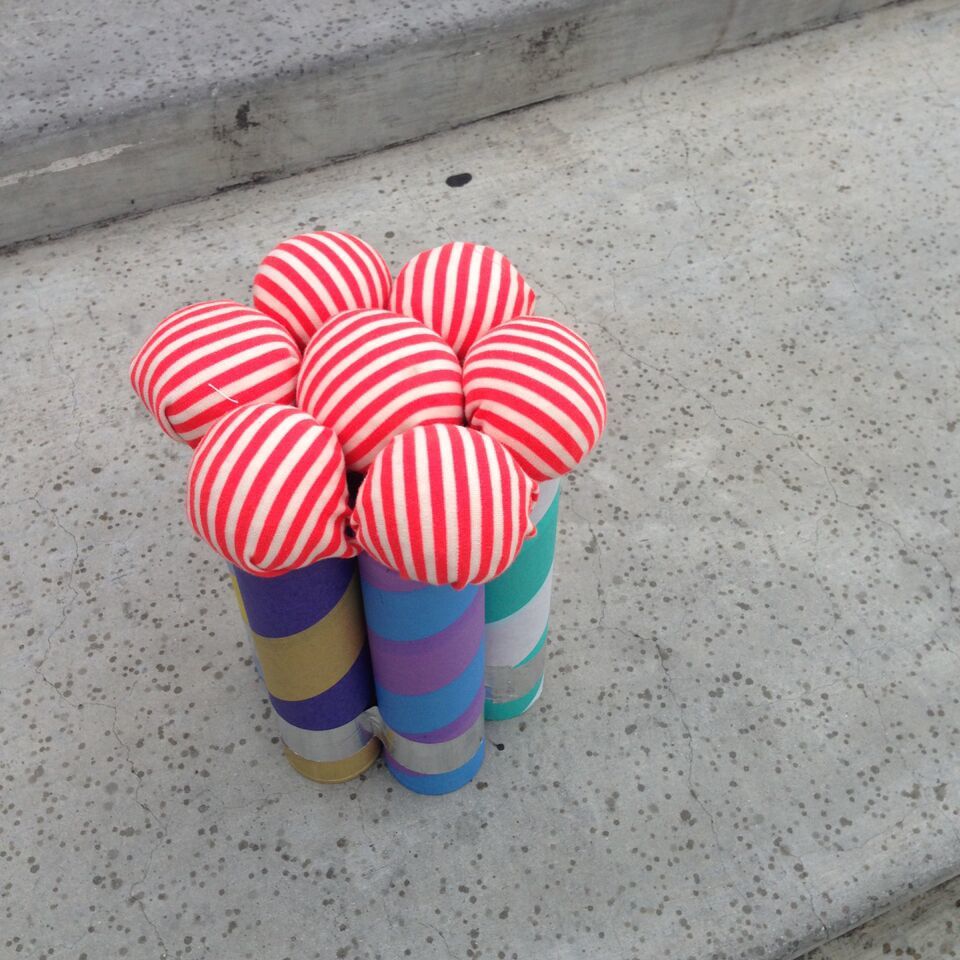
Step 2: Let’s say you want to make a chair to take a break in, like a stool. To build the structure, start with four cardboard tubes, 1 square sheet of corrugated plastic or heavy-duty cardboard, and hot glue.
Step 3: Glue one long side of each tube, and then attach them so they’re all touching. (It’ll look like a square, with two tubes on each side.) Now glue your corrugated plastic on top of the tubes. Voila, you just made a seat!
To personalize your stool, you can pre-decorate the tubes with colorful tape before gluing them together, or make slits around the edges of your corrugated plastic and then string yarn through it to make a weaving. These are just some ideas; get as creative as you want.
Here are some of the samples that Tanya Aguiñiga’s studio made. Not only are they beautiful, but we promise they work (at least for Hammer Kids they do).
Photos by Tanya Aguiñiga.